Baby brine shrimp are an excellent source of protein for your fish. It’s my number one recommendation for conditioning adults for breeding or feeding tiny fry after your fish spawn.
Hatching baby brine shrimp is really pretty simple. There are lots of options out there for hatcheries; some are low tech and super simple with a small capacity, while others are more elaborate but capable of hatching out large amounts of shrimp.
What to Look for in a Brine Shrimp Hatchery
Here’s the thing about a hatchery, it’s not actually the hatching that’s hard to do. Brine shrimp are super easy to hatch out. You could just hatch shrimp in a cup of salty water with a bubbler on a shelf.
What makes a great hatchery vs a crappy one is how well it separates the shrimp egg shells from the hatched shrimp.
The egg shells are not digestible. You don’t want to feed those to your fish.
A few every now and then is no big deal, but with every batch of shrimp you’ll have a thick, sticky layer of egg casings in the water, mixed in with the shrimp.
There are several strategies that hatcheries use for harvesting the shrimp and leaving behind the egg casings.
The eggs float and the shrimp do not, so most hatcheries let you drain the water from the bottom. You let most of the liquid out, leaving the last few inches of water in the hatchery.
Bottom draining hatcheries can produce a lot of shrimp, but they are more labor intensive and require an air pump.
The other strategy is to use a baffle, a set of rings that float on the surface of the water. Shrimp will swim over the baffle to get to light at the center of the hatchery after they emerge, but the eggs will remain on the outside of the baffle.
This kind of hatchery is very low maintenance and simple to use, but can’t produce the large volumes of shrimp that bottom draining hatcheries can.
How to Hatch Brine Shrimp
Mix Your Water
Brine shrimp are ocean dwelling creatures, and so, will require that you mix salt into their water.
Do not use regular table salt. Table salt can have anti-caking agents or added iodine.
It’s best to use:
- Aquarium salt – salt meant for adding to freshwater tanks, especially livebearer and cichlid aquariums. This stuff can be pretty pricey
- Pool salt – meant for saltwater swimming pools. It’s really cheap per pound, but you have to buy it in bulk.
- Marine salt mix – meant for mixing with tap water for marine aquariums, this is a mix of salt and minerals that’s particularly good if you want to raise brine shrimp to adulthood. Its expense is in between that of aquarium salt and pool salt, and you can buy it in a variety of sizes, not just in bulk.
Mix 1 tablespoon of salt per liter (4.25 cups) of cold tap water until the salt is fully dissolved.
You do not need to use a dechlorinator for brine shrimp hatching water. Any chlorine/chloramine in the water will help break down the shrimp eggs, making it easier for the baby brine shrimp to emerge. I’ve personally been hatching brine shrimp for over a year now and have never once added dechlorinator to the water.
Hobby Artemia Hatchery
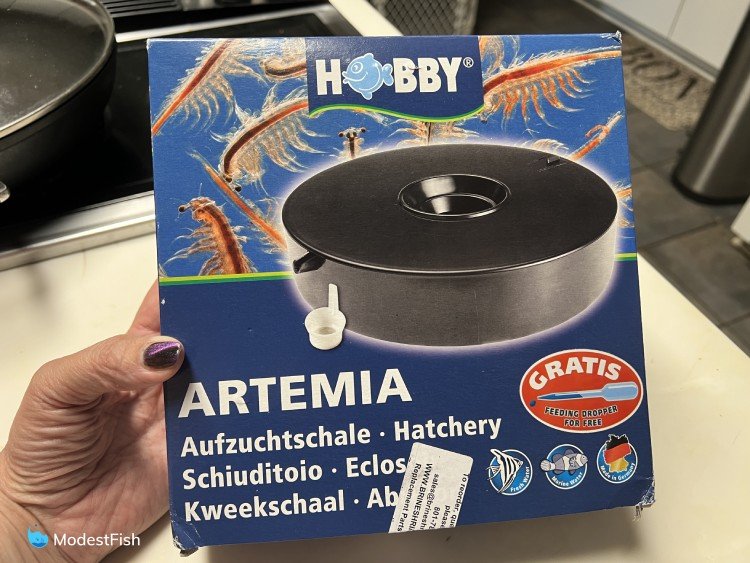
Setting up this hatchery is so super simple! You do not need an air pump for this hatchery. It’s awesome.
- Mix up 3 teaspoons of salt in 3 cups of water until the salt is fully dissolved.
- Take the lid off of the hatchery, remove the measuring scoop and the sieve from the center. You can leave the baffle in place.
- Fill with saltwater. 3 cups should put the water right at the fill line. Put the sieve back in the center.
- Using the measuring scoop that comes with the kit, place 1-2 scoops of eggs in the outer ring of the hatchery.
- Place the lid on the hatchery and put the sieve in the center hole.
- Depending on room temperature, you’ll start to see shrimp hatch out 18-24 hours after you set up the hatchery. The warmer the temperature, the faster shrimp will hatch.
- To harvest shrimp, you can just pull up the sieve to net the shrimp above it. Or you can just suck up shrimp with a pipette or turkey baster.
- Shrimp will continue to hatch out for another 24-48 hours.
- When that batch of eggs is spent, you simply dump the remaining water and egg casings down the drain and rinse all the parts with warm tap water. You can then just fill the hatchery back up for the next round of shrimp.
Tips:
- Do not jostle or try to move this hatchery after it’s been set up! This will splash egg casings into the center rings.
- There is no need to add an air pump to this hatchery. It can just sit on a shelf and do its thing.
- Placing a bright light near the lid a few minutes before harvesting will bring even more shrimp to the center.
- This hatchery will produce enough brine shrimp to feed small batches of fry, but the capacity is limited.
- I would highly recommend this hatchery if you’re wanting to just hatch out shrimp to supplement your fish’s diet. No need to get one of the big complicated ones if you just want to add some protein to the menu.

Last update on 2024-04-20 / Commissions Earned / Images from Amazon Product Advertising API
Aquavista Aquatics Hatchery
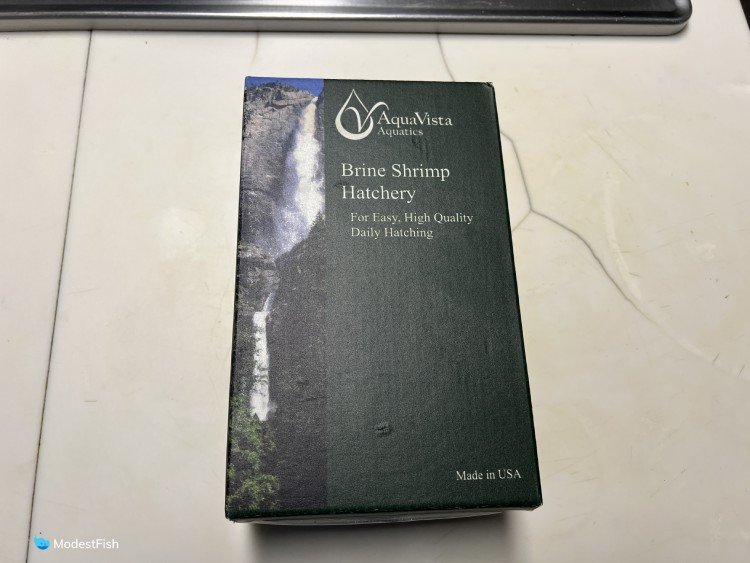
This hatchery is a bit more complicated than the Hobby brand one, but it’s capable of producing much larger batches of shrimp.
This would be my choice if you’re wanting to raise large groups of fry.
Assembly
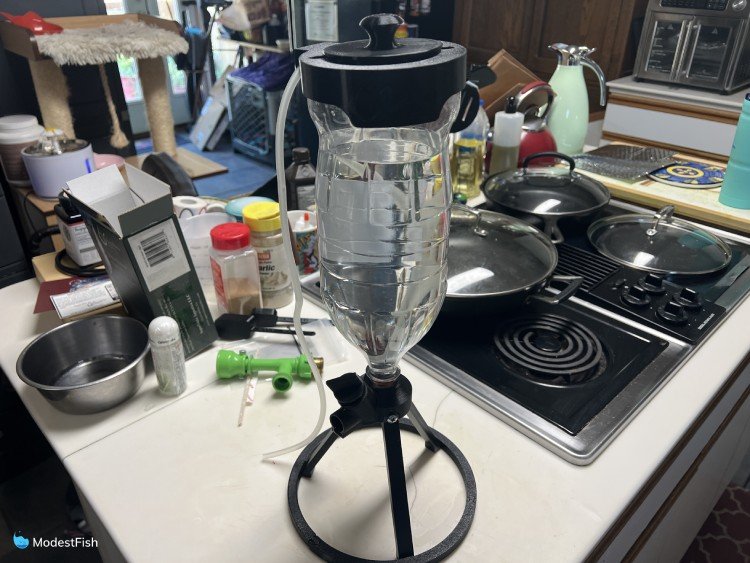
You will need an air pump and an empty 2 liter bottle to use with this hatchery.
I ended up using an empty Diet Coke bottle, but any clear soda bottle will do the job. Cut the bottom of the bottle off. I think I only took about 1 inch (2.5 centimeters) off.
What you get in the kit is a 3D printed base that the bottle screws into and a lid that fits over the cut off base of the bottle.
Assembly was super easy. The instructions were great and everything fits together very easily.
When I first saw the design of this hatchery, I was worried about it being unstable. I must say, it’s really sturdy.
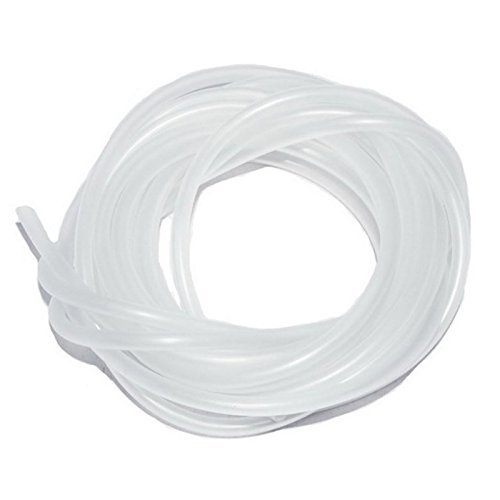
The only thing I didn’t like is that the nipple where you attach the airline is a little too big for the airline they give you. The tubing kept splitting. I had to use my own airline to get it to work.
Overall, super impressed with the design. You even get these awesome 3D printed scoops for measuring your salt and your eggs!
Hatching Brine Shrimp with the Aquavista Hatchery
- Fill the hatchery with 2 liters of water.
- Add 2 Tablespoons of salt. (No need to premix, the bubbling action will mix everything for you.)
- Add up to 2 teaspoons of brine shrimp eggs.
- Connect the hatchery to a small air pump.
- Let the hatchery sit for at least 24 hours.
- Disconnect the hatchery from the air pump and let it settle for about 15 minutes. If at all possible, put a small light, like a flashlight or pen light, below the hatchery. This will encourage the brine shrimp to swim down.
- Place a container below the spout and twist the knob so that water can drain from the bottom of the hatchery. Make sure to leave at least several inches of water in the hatchery so you don’t accidentally get a bunch of egg casings.
- Cleanup is simple, just drain the rest of the water in the sink and rinse the inside of the bottle with hot tap water.
Tips:
- You might have to fiddle with the lid a bit to get it to fit right on the bottom of the bottle when you set this up. It’s not hard to do, I just had to wiggle it around a bit.
- Turn the knob slowly when you go to harvest your hatch. You don’t want it to come out in a huge rush.
- I’d recommend going with a very small air pump for this. I used a mini USB air pump and it was more than enough to keep everything tumbling.
- Definitely, go with a softer, more flexible airline hose so it will fit over the intake.
| Preview | Product | |
|---|---|---|

|
Brine Shrimp Hatchery (Deluxe, Black) | Buy on Amazon |

|
DishyKooker 2PCS Aquarium USB Air Pump Portable Mini USB Aquarium Fish Tank Oxygen Air Pump Mute... | Buy on Amazon |
|
AQUANEAT Aquarium Tubing, Airline Tubing, Standard 3/16” Tubing for Fish Tank Air Pump (40Feet,... | Buy on Amazon |
Last update on 2024-04-21 / Commissions Earned / Images from Amazon Product Advertising API
Conclusions
I really like both of these hatcheries. They’re fairly simple to use and extremely easy to clean.
The Hobby hatchery is a great option for simple, small batches of brine shrimp. I love that it can just sit on a shelf with no pump and still produce shrimp for me.
The Aquavista hatchery was able to produce a huge batch of shrimp, exactly what I needed for feeding all the hungry mouths I have around the house. This would be the perfect thing for producing enough brine shrimp for my batches of angelfish fry.
Both hatcheries do a great job of separating the hatched shrimp from the egg casings. The biggest determining factor between the two will be how many shrimp do you need to produce at a time.
I hope you find this article helpful.
I wish you and your fish the very best!
