One of the most popular aquarium plants, java moss is easy to grow, hardy, and can be used in a number of ways.
It’s no wonder why it’s one of the most popular aquatic plants used for aquascaping.
In this guide, you’ll learn how to provide the right conditions so it’ll thrive and the different ways you can use it in your tank.
Java Moss Quick Care Stats
- Scientific Name: Taxiphyllum Barbieri (formerly Vesicularia dubyana)
- Care Level: easy
- Growth Rate: medium
- Tank Placement: foreground/midground, makes a good carpeting plant
- Lighting Requirement: will thrive in low to bright light
- Ideal Temperature: 70°-86°F (21°-30°C)
- pH: 5-8
- Water Hardness: up to 20 dGH (333 ppm)
Table of Contents
Java Moss (Taxiphyllum Barbieri) Overview
Java moss is native to tropical regions of Southeast Asia. It grows on forest floors, tree trunks and along river banks.
Scientists don’t completely agree on what to call Java moss. It used to be sold in aquarium shops in Asia under the scientific name Vesicularia dubyana.
But researchers have not been able to confirm that Java moss in the aquarium trade is the same species. So the name has been changed to Taxiphyllum Barbieri.
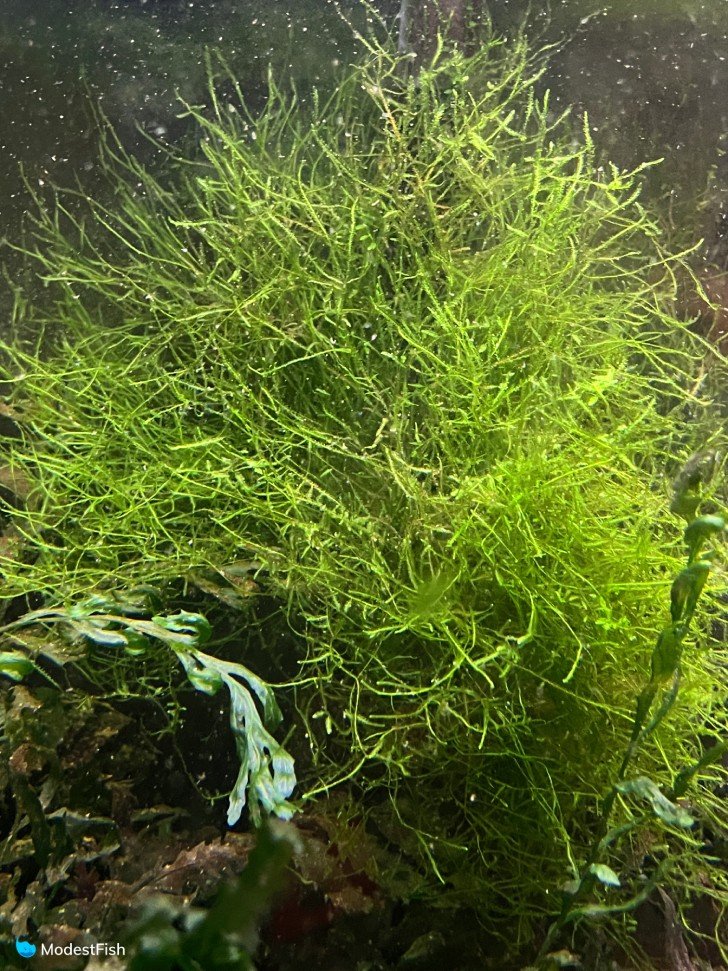
It grows in an irregular pattern of stems covered in tiny leaves. The stems grow anywhere from 3-10 inches long (7.6-25.4 cm).
Older growth is dark green, but new growth tends to be much brighter.
One of the things that I’ve always found interesting about plants like Java moss is that they don’t have roots. They have these sticky little “feet” called rhizoids.
They only use the rhizoids to anchor themselves in place, but not to eat. They absorb water and nutrients directly through their stems and leaves, not the rhizoids.
This means you can stick Java moss almost anywhere in a tank and it can grow there. You don’t have to worry about root growth or having it down in the substrate.
Java Moss Care & Tank Requirements
One of the best things about Java moss is that it really doesn’t need that much care or a fancy setup.
Lighting for Java Moss
You don’t need strong lighting to grow Java moss. It will do just fine under low lights, just like Java fern or anubias.
More light means that it will grow faster, but that also makes it easier for algae to spring up.
Pro Tip: You should only run your aquarium lights for 8-10 hours a day. This can really help algae from going crazy in the tank. If you forget to turn off your lights all the time, consider putting your lights on a timer.
Fertilizer for Java Moss
Java moss really doesn’t need fertilizers to grow well. It will grow faster if you use fertilizers, but frankly, it already grows pretty fast all on its own.
Since Java moss doesn’t have roots, the best fertilizers to use are liquid additives that go into the water column.
Using CO2 with Java Moss
Using CO2 with Java moss is not an absolute requirement. It will grow just fine in a low tech setup.
It will grow faster with pressurized CO2, but again, it already grows pretty darn fast without it.
How to Plant Java Moss
Java moss does best when it has something to grow on.
You can attach it to driftwood, cholla wood, rocks, plastic mesh or even plastic decor.
Pro Tip: Live aquarium plants, even ones from reputable growers, can carry things like nuisance algae or pest snail eggs. It’s best to give new plants a bleach dip to kill off any hitchhikers
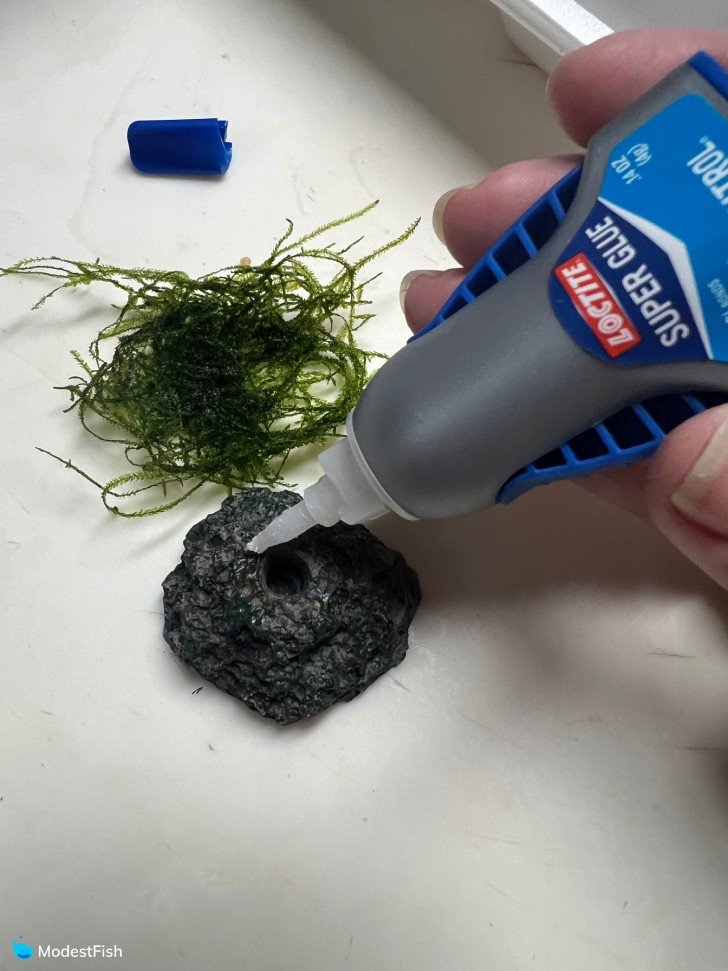
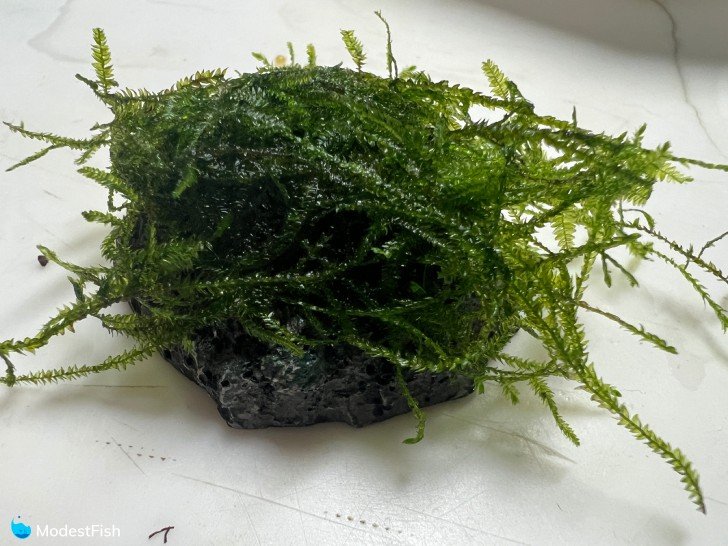
Attaching Java Moss to Hardscape with Super Glue
Equipment:
- Java moss
- Anchor decor (rocks, driftwood, etc)
- Super glue gel
- Clean spray bottle
- Forceps (optional)
Pro Tip: Make sure that you get super glue gel. Gel super glues contain cyanoacrylate that will set even if it’s underwater.
Steps:
- You can pull large clumps of moss apart into 2 inch pieces.
- Place a small dot of super glue directly on the decor.
- Carefully press the moss onto the super glue. Do your best not to touch the super glue with your fingers. You can easily glue yourself to the decor or the moss. If it’s a real problem, you can use forceps so you don’t touch the glue.
- If moss starts to dry out while you’re working, spray it lightly with plain water to rehydrate.
- Once moss is attached, decor can be placed back into the tank.
Tying Java Moss to Hardscape
Equipment:
- Java moss
- Anchor decor (rocks, driftwood, etc)
- Fishing line or cotton thread
- Clean spray bottle
- Scissors
Steps:
- You can pull large clumps of moss apart into 2 inch pieces.
- Place pieces of moss on decor and carefully tie it in place with cotton thread or fishing line (Personally, I just use a basic square knot). Clip off excess line/thread.
- If moss starts to dry out while you’re working, spray it lightly with plain water to rehydrate.
Cotton thread will break down over time. Hopefully, the moss will stick to your decor on it’s own by the time that happens.
Fishing line can be snipped and removed once moss sticks on its own.
Pro Tip: It’s OK for your moss to look really thin and spread out at first. It will grow and fill in over time. Keeping it thin at first is actually a good thing. It lets the maximum amount of light hit all of the stems and leaves. This lets moss get established more quickly.
Carpeting/Walls
Equipment:
- Java moss
- 2 Sheets (at least) of plastic canvas
- Suction cups
- Scissors
- Fishing line
- Plastic canvas needle
- Measuring tape
- Small knife
Steps:
- Measure the area inside the tank that you want to cover with a Java moss wall/carpet.
- Keep in mind that the wall/carpet will need to stick directly to the glass, no substrate or other decorations can be in the way. Clean the glass really well. Algae can prevent the suction cups from getting a good grip.
- Cut your sheets of plastic canvas to fit the desired area. You’ll need to cut 2 sheets to the exact same measurements.
- Very carefully twist the tip of a small knife into one plastic sheet. You want to make holes just big enough to poke the back of the suction cups through. You need to attach suction cups at each corner and about every 6 inches in between along each side. A few extra in the middle will add more stability.
- Spread moss in a thin layer over the sheet with suction cups.
- Place the second sheet over the moss.
- Using the plastic canvas needle, sew the sheets of plastic canvas together. You don’t need to pass the needle through each square. Just pass it through and loop it around a few times every 2 inches or so.
- Go around all four edges of the plastic canvas, tie off the ends and cut off excess fishing line.
- Sew a few rows of horizontal lines every 6 inches or so across the plastic canvas, tie it off and cut off excess fishing line. This keeps the moss from just sinking to the bottom between the two pieces of mesh.
- Carefully place the plastic canvas inside the tank, press down firmly to get the suction cups to take hold on the glass.
Pro Tip: Sometimes, a carpet will grow so much Java moss that it starts to float. Adding rocks in the corners can help weigh the carpet down and keep it in place.
How to do a Bleach Dip for Java Moss
Equipment:
- 2 buckets
- Bleach (no scents or other additives, just the plain cheap kind)
- Dechlorinator
- Tap water
Steps:
- Mix 1 part bleach to 20 parts water in a bucket.
- Fill the second bucket with the same amount of water and add 5 times the normal tank dose of dechlorinator.
- Take the Java moss out of original container and discard the water.
- Place the moss in the bleach solution for no more than 20 seconds.
- Immediately put the moss in the bucket with dechlorinator. Allow to soak in dechlorinator for several minutes.
Ways To Use Java Moss In Your Aquarium
One of my favorite things about java moss, is how versatile it can be in a planted tank.
Here are the different ways you can use it in your aquarium:
Carpeting with Java Moss
You can use Java moss to make a lush green carpet along the floor of your aquarium.
The moss is usually sandwiched in between pieces of plastic grid. The grid gets attached to the bottom of the tank and the stems grow out through the spaces.
It eventually fills in enough that you can’t see the grid at all, just a shaggy green carpet.
Using Java Moss for Walls
Walls are made the same way as carpets. They’re just attached to the wall instead of the floor.
Pro Tip: Lots of Java moss growing in your tank is a good thing. The moss eats up excess nutrients, like nitrates (NO3- ) from fish waste. This helps keep your water cleaner.
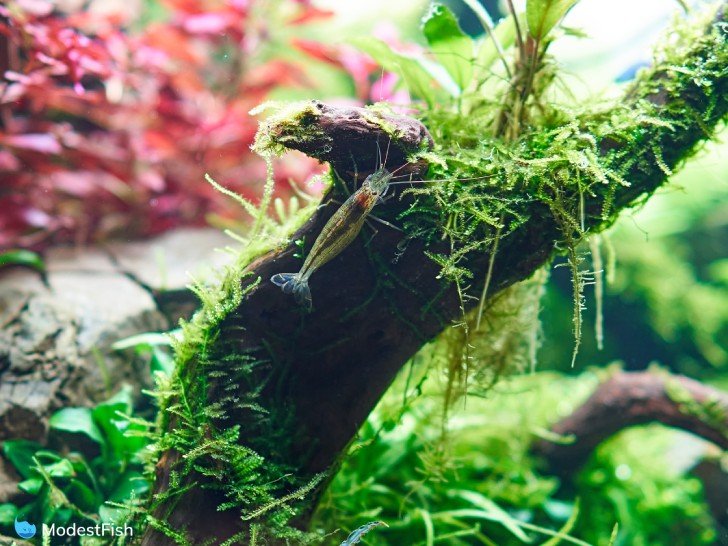
Creating Trees with Java Moss
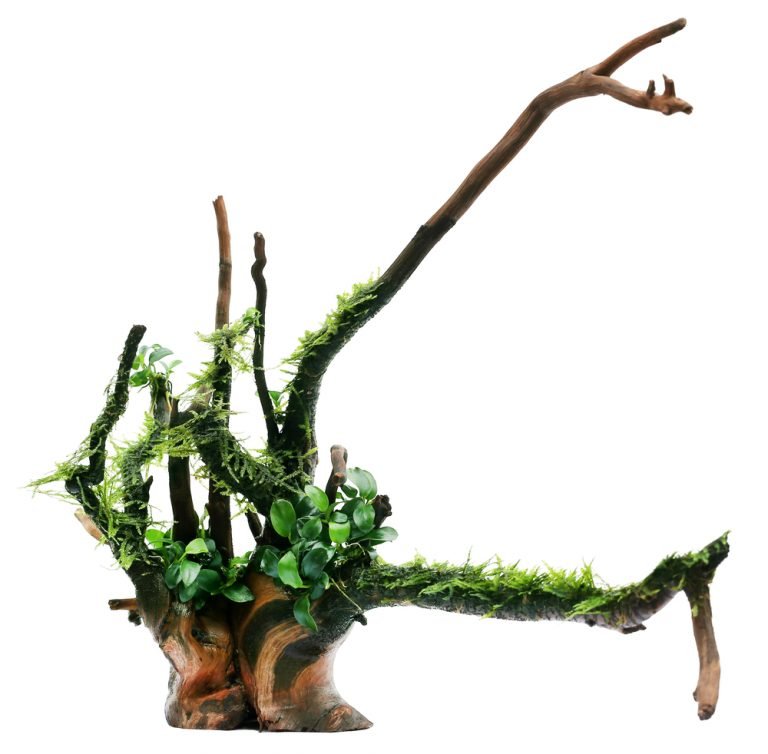
Of all the ways to use Java moss, I think the trees are my favorite.
A piece of driftwood is placed in the tank so it looks like a tree trunk and moss is attached to it. As the moss grows out, it makes it look like there is a small Bonsai tree growing inside the tank.
Pro Tip: Java moss can be tied on with fishing line or even super glued to branches. Over time it will stick to the wood on its own.
Spawning Mop
Lots of fish, like tetras and rainbow fish, scatter their eggs on plants. The eggs sink down into the plants and stick there. This keeps them safe from hungry fish, even their own parents.
Loose tangles of Java moss are put in breeding tanks. Once the fish have spawned, the Java moss can be moved to a different tank so the fry can be raised.
Java Moss for Raising Fry
Java moss is great for fry tanks. It gives fry a place to hide and feel more secure.
It can also provide food for them. Tiny microorganisms called infusoria grow on Java moss. This is the best possible first food for most baby fish.
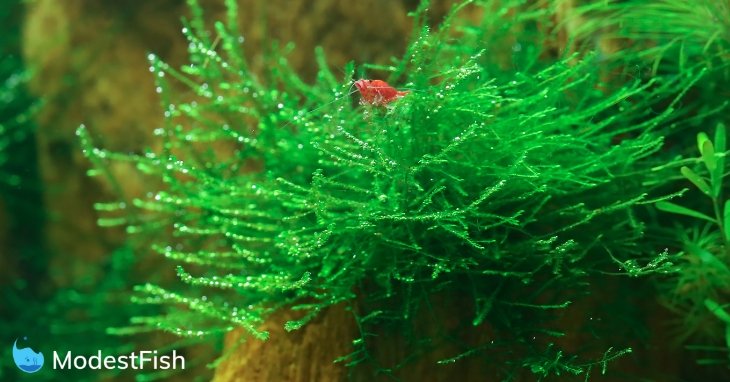
Ornamental Shrimp
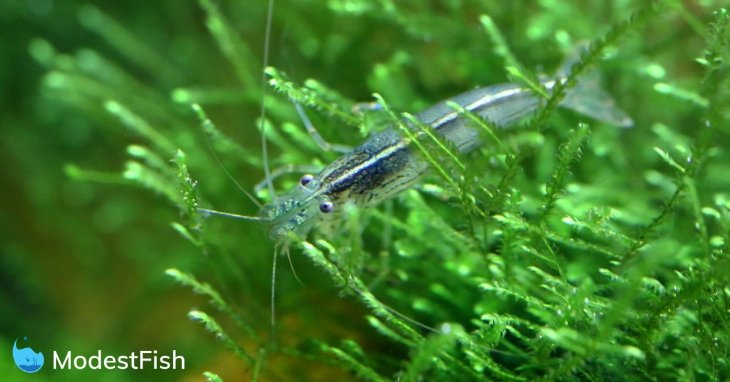
Pretty much any serious shrimp keeper will tell you that Java moss is a must have. Shrimp love this stuff.
It gives them a place to hide and they will endlessly sift through the Java moss eating algae and biofilm.
How to Maintain Java Moss
Once you’ve planted your java moss, here are some maintenance techniques you can use to keep it looking fresh.
Cleaning Java Moss
Detritus, like fish waste and uneaten food, can get stuck in Java moss, especially if it’s in a low flow area.
It looks pretty gross, plus detritus breaking down can put off nitrates in your water, bringing down water quality.
There are several ways of getting out the built up gunk.
If the moss is attached to a rock or piece of driftwood, you can just take the whole thing out of the tank and rinse it under running water.
You can also siphon detritus out of the moss. ⅜ inch tubing is a good size. You can poke it down into the moss and and suck out all the yucky stuff.
Trimming Java Moss
If left completely alone, Java moss will grow into a…well…giant blobby mess comes to mind as the best way to describe it. I’ve seen it build until it takes up every inch of a tank.
It should be trimmed with scissors now and then to keep it from getting too overgrown. This helps keep the moss healthier because light can’t get to middle stems and leaves if the moss is in one big ball.
Also, as Java moss starts to turn itself into a giant snarled mass, older growth can die off.
It’s not that the whole plant will die, but as the older growth dies off, it’s nearly impossible to get it untangled from new growth.
Trimming the Java moss regularly helps to make it look neater and stops old growth from dying off inside a big mass.
Common Issues with Java Moss
As fantastic as java moss is, there are some issues you can face.
Here they are and how you can overcome them.
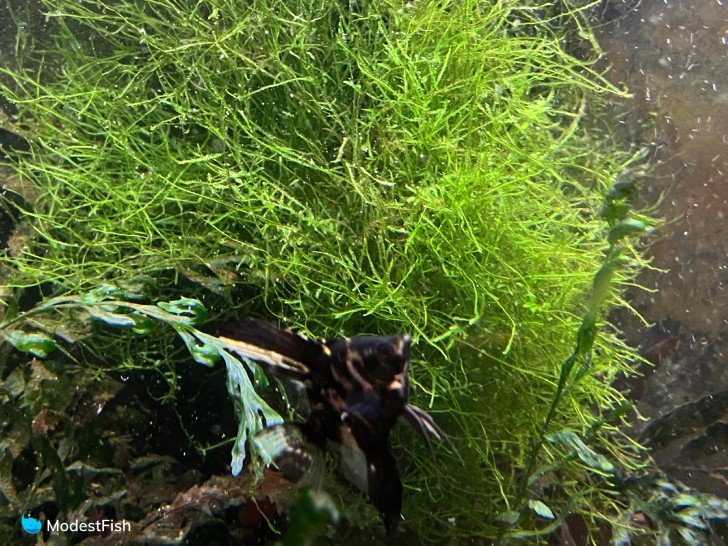
Algae
It’s very common for algae to crop up on Java moss. This is especially true if lighting in the tank is more intense or stays on for long periods of time.
The algae grows more quickly than the moss and can become embedded. This makes it just about impossible to remove the algae without ripping up the moss with it.
Freshwater shrimp, like cherry or Amanos, are the only animals that can get into the moss and physically clean off the algae. But, these may not be compatible with the rest of your livestock.
To get rid of the algae, you can spot treat your moss with Seachem Flourish Excel at the normal tank dosage. Squirting the Excel directly onto affected areas with a turkey baster works well.
You can also partially drain the tank and spray hydrogen peroxide directly onto the algae and let it sit for several minutes before refilling the tank. The peroxide will kill off the algae, but the moss will be just fine.
Pro Tip: Make sure you keep up on water changes, don’t fertilize too much and only keep your lights on for 10 hours a day or less to help keep algae under control.
Trimming Can be a Mess
Trimming Java moss is a great idea, but it comes with one major problem, mess!
As soon as you cut off a piece of moss it wants to sink to the bottom of the tank. If you miss pieces when you go to clean up, they’ll get washed all over the tank when you start the filters back up.
The best way to keep this from happening is to siphon out pieces as you cut them. Using ⅜ inch tubing will give you enough suction to get out the trimmings but won’t suck out too much water too fast.
Some ingenious people even use a rubber band to attach their scissors to the siphon hose so they have a hand free.
Is Java Moss Right for You?
Java moss really is a great aquarium plant, especially for beginners. Java moss is great to help control nutrient levels in your tank, plus it looks really cool, a great combination.
It doesn’t require CO2 or fertilizers or even a green thumb.
And you won’t need to break the bank buying over the top lighting to get it to grow well. It can adapt to a wide variety of water parameters.
The stuff is practically bomb proof. You know how everyone is always saying that cockroaches will survive a nuke? Well, I have a feeling that Java fern will be right there along with them.
In fact your biggest problem may be that it grows so well you end up with too much of it. It’s always nice when the biggest drawback to a plant it that it grows like mad and you get tired of trimming it.

I really appreciate all of this information. I’m located in Central Florida and I’m a grower/plant collector of many different varieties. Recently I decided it was time to get another aquarium (small this time, we had to give our 40 gallon away a few yrs ago, supplies, equipment, african cichlids and all).. Boy do I miss it dearly. Now, I have a 5 gallon Betta tank with java moss and fern but I can’t seem to keep them green and happy. My testing kit is coming within these next few days, but last time I stripped it (a week or 2 ago) it was good and has been for about a month now. I do weekly to biweekly water changes but it doesn’t seem to help. I add the prime to my water everytime I do a water change so I don’t think it could be hard water. They are getting brown spots everywhere and it just doesn’t seem normal. I’m pretty new at aquariums and need to refresh my knowledge a bit. Do you have any suggestions. I hate to ask but I’ve searched all over the internet this week and can’t seem to find an accurate answer. I want the best conditions for my beta, little albino cory catfish and the beautiful the plants any help would be much appreciated. My head is spinning lol.. I’m really great with potted plants but this underwater life is a while different ball game and something I’m very interested in learning about so I can start expanding my hobbies a bit? Thank you so much, from the bottom of my pots!?? I hope you have a beautiful day! I look forward to hearing from you and learning more. I’m going to check out your Instagram today too!
Sorry for all the misspelling in my previous comment. My auto correct is terrible ?