Sponge filters are a simple, cheap and effective means of filtering your aquarium.
Even the most novice of aquarists can easily put one together and use it in a tank.
They provide:
- Mechanical filtration – suctions up solid wastes and detritus and traps them
- Biological filtration – provides huge amounts of surface area for beneficial bacteria to grow on
- Aeration – breaks up the surface tension of the water, encouraging gas exchange and gently moves oxygenated water around the tank
These little aquarium workhorses are also exceedingly easy to install. There are several different kinds of sponge filters on the market, so today, let’s go over how you set up each of them.
Table of Contents
Components of a Sponge Filter

Air Pump
Most sponge filters are air driven, meaning you’ll need a separate external air pump to connect to them.
Make sure to get an air pump that is appropriate for your tank size. The deeper your tank is, the more powerful the pump will need to be to push against the resistance of the water.
Most air pumps will specify what tank size they are rated for.
For an in-depth comparison of several pumps available on the market, please see our article, here.
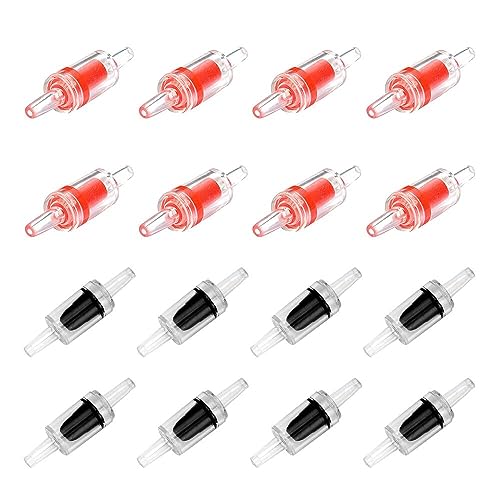
Check Valve
Check valves are very, very important.
A check valve is a tiny device that keeps water from back flowing into your air pump if the pump stops.
When air stops pushing through the tubing, it creates a vacuum that sucks up water out of the tank and back towards the water pump.
If water gets inside your air pump, the pump will be ruined.
The check valve lets air move through the tubing towards the tank, but it stops water from flowing back towards the pump. They’re super simple to install, you just cut the airline tubing a foot or so from the pump and the check valve fits in between the cut ends.
I’ve bought these BornFeel valves twice now and I’ve been really happy with how they work.
Yes, I need a lot of check valves, I’m an aquarium nerd and I have 8 tanks.
Last update on 2024-04-24 / Commissions Earned / Images from Amazon Product Advertising API
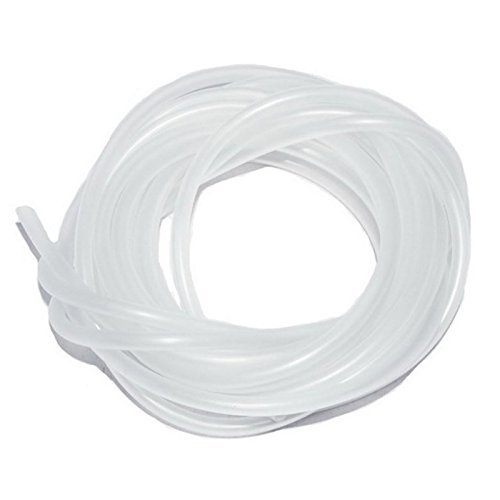
Airline Tubing
Airline tubing is essential for any sponge filter. It’s what connects the air pump to the sponge filter.
There are a lot of different choices out there for airline tubing. Some people like to get black or blue airline, instead of clear. Frankly, I’ve never found that colored tubing is less visible in the tank, so I just use clear, but to each their own.
I’ve used so many different brands over the years, but the tubing that Aquaneat makes is my absolute favorite, it’s the only kind I buy anymore.
It’s very, very flexible, even after months or even years of use. A lot of other brands stiffen up over time and can’t be repositioned.
The Aquaneat is also just a smidge bigger around than other brands, making it much easier to fit onto things like valves, airstones and pump outlets.
It also grips very well onto the plastic nipples on air pumps, valves and airstones.
Last update on 2024-04-25 / Commissions Earned / Images from Amazon Product Advertising API
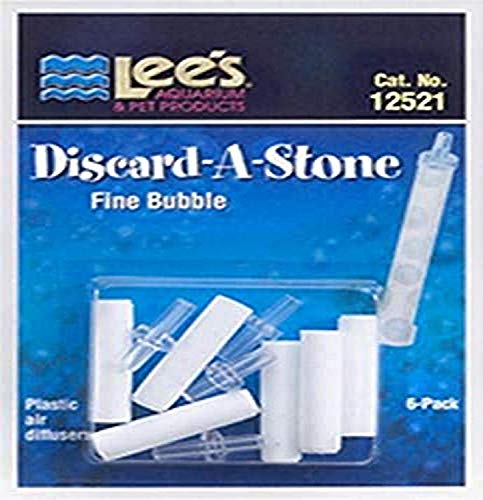
Airstone
You can install an airstone or diffuser inside some kinds of sponge filters. This breaks up the stream of big bubbles into a fine mist.
A stream of small bubbles provides greater lift, which in turn, creates more suction through the sponge.
It also has the added benefit of making the filter more quiet. When big bubbles break the surface, they make an audible “blub, blub” sound.
Fine bubbles produce a slight whooshing sound that you may not even hear over normal background noise in your house.
My favorite diffusers to use inside sponge filters are the Lee’s discard a stone. They create an even finer mist of bubbles than a regular airstone.
Last update on 2024-04-25 / Commissions Earned / Images from Amazon Product Advertising API
You can add an airstone to classic Hydro sponges. You cannot add them to a lot of non-hydro sponges or sponge filters with the add media compartments.
Powerhead
You don’t have to use a powerhead for your sponge filter. Most people prefer to use an air driven sponge filter.
But, if you want a sponge filter that is completely silent, using a powerhead is the way to go.
Powerheads are small, submersible water pumps that people use in aquariums to increase water flow inside the tank.
You can place the intake of the powerhead against the lift tube of the sponge filter. So, when the powerhead sucks in water, it will pull water through the sponge and push it out through the powerhead’s outflow.
Since the pump is below the water’s surface, it is completely silent. There are no bubbles breaking the surface, so no noise.
Here are some things to consider if you want to attach a powerhead to your sponge filter:
- Get a powerhead that is appropriate to the size for your tank. Most powerheads have a tank size rating. If a powerhead is too large for your aquarium, it can generate too much current in the tank.
- Make sure the powerhead’s intake will fit inside the lift tube of the sponge filter. These two pieces have to fit together in order to create suction through the sponge.
- The powerhead will need to be plugged in. The power cords on water pumps are often fairly short. You may need a small extension cord, depending on the placement of the powerhead in your tank in relation to your power outlet.
Please, see our in-depth article comparing different powerheads on the market, here.
How to Set Up a Sponge Filter
There are many different styles of sponge filter available. I can’t possibly cover every single make and model, but I’ll do my best to go over the major kinds.
Classic Hydro Sponge
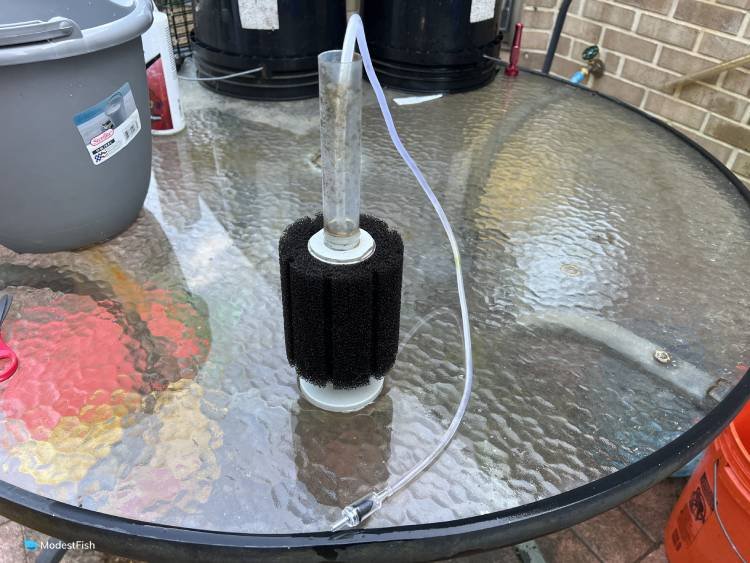
This is my all-time favorite brand of sponge filter. I like that you can add an airstone to these filters. It makes them very quiet and very efficient.
The sponge also holds up for several years before it needs to be replaced.
Set up steps:
- Attach the bottom piece of the strainer to the weighted base.
- Place the sponge over the bottom piece of the strainer.
- Cut a 1-2 inch (2.5-5 centimeter) piece of airline tubing. Attach one end to the diffuser and the other end to the tube that runs through the bullseye.
- Push the two pieces of the strainer together with the diffuser inside.
- Push down on the top of the bullseye to lock everything into place.
- Attach a piece of airline hose to the top of the bullseye and run this through the lift tube. Push the lift tube onto the top of the bullseye to lock it in place.
- Run the airline hose from the sponge filter to the air pump.
- Cut the airline tubing about six inches from where it emerges from the tank and install the check valve.
And that’s it. It’s super simple to get one of these guys set up!
Non-Hydro Sponge Filter
Several brand names, like Aquapapa, Aquaneat and Pawfly, sell what appear to be the exact same sponge filters. They look similar to Hydro sponge filters, but the base isn’t quite as heavy, the sponge is a slightly different material, and you can’t add on a diffuser to these models.
I’ve been running a few of these filters in several of my tanks. They work well as sponge filters, but they’re a bit louder because you can’t add on a diffuser or airstone inside the strainer. This means the stream of bubbles isn’t a super fine mist.
Set up steps:
- Push the two pieces of the strainer together.
- Attach the strainer to the weighted base.
- Place the sponge over the strainer.
- Push the bullseye onto the top of the strainer. Unlike a Hydro Sponge bullseye, it will only go on one way. The side with the larger tube faces down.
- Attach airline tubing to the top of the bullseye and run this through the lift tube.
- Run a piece of airline hose from the sponge filter to the air pump.
- Cut the airline tubing about six inches from where it emerges from the tank and install the check valve.
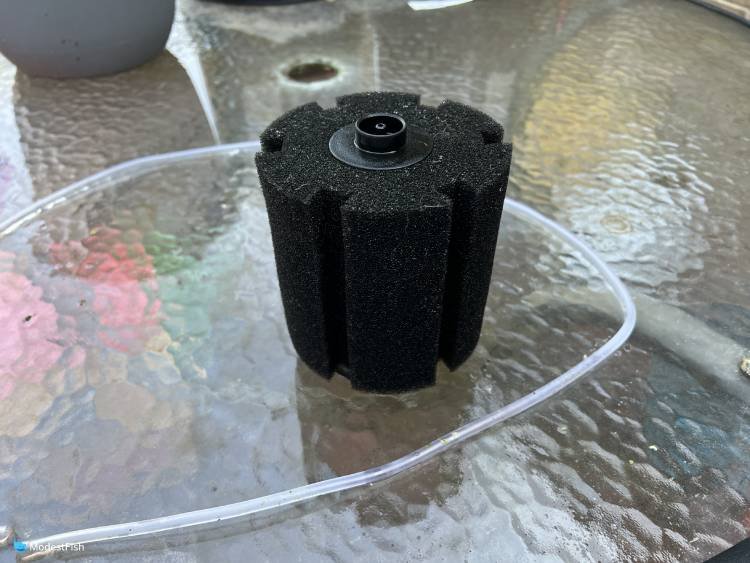
Sponge Filter with Media Compartments
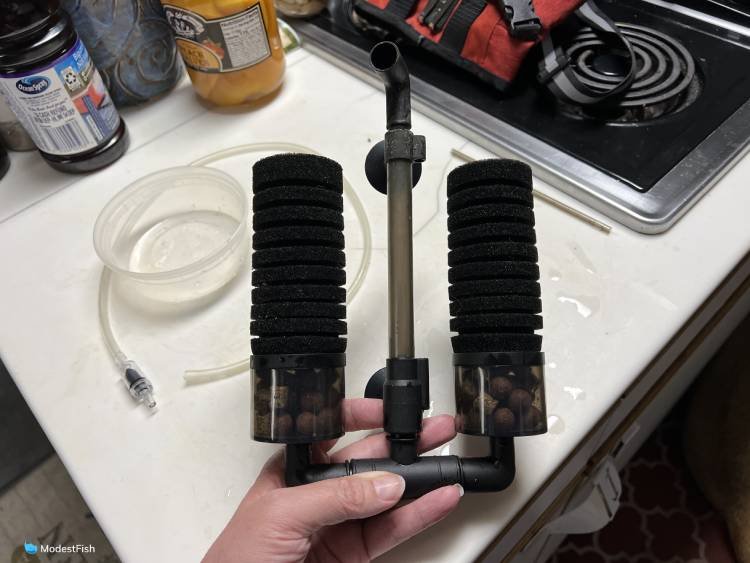
I like these little filters. They’re a great choice for tanks up to 20 gallons.
Air is pumped through a central tube and out a small spout.
This draws water through a small sponge first and then an open compartment filled with ceramic biomedia.
Between the sponge and ceramic media, there’s tons of room for beneficial bacteria to grow.
And when you need to swap out the sponge for a new one, you still have a healthy population of beneficial bacteria growing on the ceramic media.
And, if you adjust the spout so that it’s at the surface of the water, it will break up the bubbles and make this filter mostly silent.
Set up steps:
- Rinse the ceramic media that’s included with the filter. The ceramic pieces rub up against each other in transport, creating dust.
- Open the media compartments. Most manufacturers pack an extra set of sponges inside these. Just take those out and store them for later.
- Fill the compartments with media and snap the lids in place.
- Slide the sponges over the holder that sticks out of the top of the media compartment.
- There should be a small tube, or plastic nipple, on the side of the main pipe. Run a piece of airline hose from this to the air pump.
- Cut the airline tubing about six inches from where it emerges from the tank and install the check valve.
Built-in Powerhead
Some sponge filters with media compartments have a built-in powerhead.
I’ve had a few of these over the years. They’re usually meant for smaller tanks.
They’re very simple.
Set up steps:
- Rinse the provided biomedia and put it into the compartments below the sponges.
- Plug in the attached powerhead.
I know this seems like a really easy alternative to other sponge filters, but I’ve found that the powerheads on these aren’t great. They last maybe a year or two at best.
And when the pump conks out on you eventually, you have to throw the whole thing out.
So, definitely better than no filter, but I personally prefer getting a sponge filter that has interchangeable/replaceable parts.
Final Thoughts
Sponge filters are awesome, in my opinion. Super cheap, easy to maintain, reliable and they provide excellent mechanical and biological filtration.
I have sponge filters in all of my tanks. Four of my tanks have run on nothing but a sponge filter for several years.
I love how easy and reliable they are.
There are many types of sponge filters available in the hobby, but all of them are simple enough to be set up in mere minutes.
I hope you find this article helpful.
I wish you and your fish the very best!
